
We use cookies on our website to give you an improved browser experience. View our Privacy Policy for more information. Please make your selection to opt in or out of ALL cookies here: Accept or Decline
Creating Exterior Home Renderings is more than placing a house inside a polished digital scene. It is a practical visual process that connects architectural drawings with the client’s future experience. A successful rendering should show scale, materials, daylight, landscaping, and the relationship between the home and its surroundings. The front path should feel walkable. The window reflections should appear believable. Even a small shadow can affect the entire impression.
Alex Hogrefe, an architectural visualization artist and educator, offers a useful principle: “The image should communicate the design, not compete with it.” This idea matters when choosing camera height, sky conditions, textures, and decorative details. A dramatic sunset may attract attention, but it can also hide poor proportions or unclear construction choices. Clear evidence matters more than visual excitement.
The process usually begins with accurate plans and reference photographs. Designers then build the exterior model, apply realistic materials, set lighting, and test several viewpoints. Brick should show subtle variation. Concrete should not look perfectly clean. Trees need irregular branches, not repeated digital shapes. Small imperfections create credibility.
Still, no rendering is completely objective. A carefully chosen camera can make a narrow entrance appear generous. Bright landscaping can distract from weak architecture. Therefore, review the image with a builder, designer, and client. Ask what feels unclear. Revise it.
Good Exterior Home Renderings do not promise perfection. They reduce uncertainty, reveal design problems, and help people imagine daily life before construction begins.
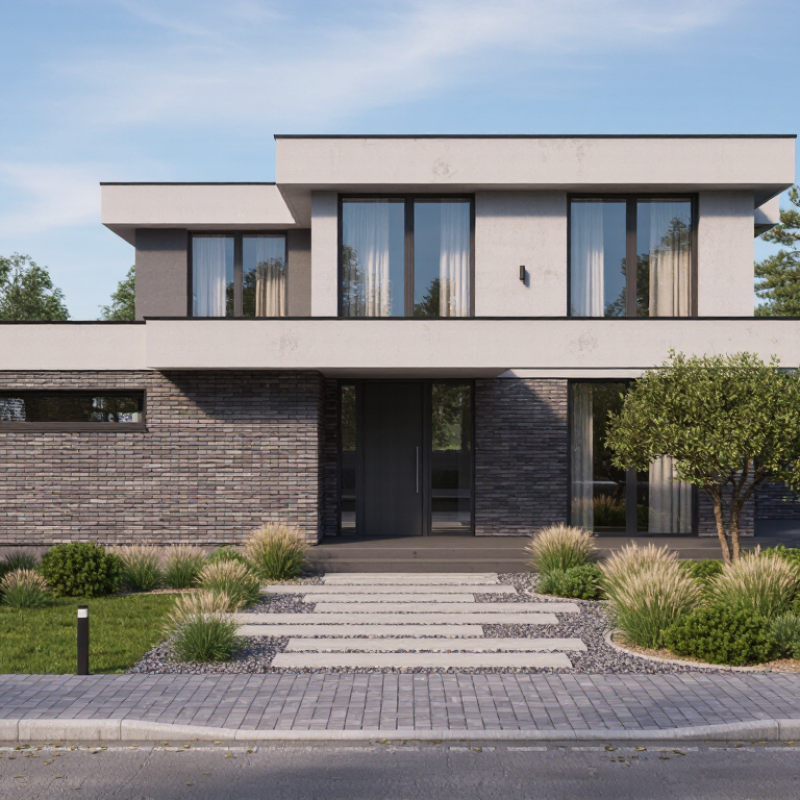
Before modeling, define a rendering brief that treats the house as measurable evidence, not decoration. Set every major dimension at a 1:1 scale, including wall height, roof pitch, window size, and site boundaries. Record the source of each measurement and mark uncertain areas clearly. Without this discipline, attractive images can still misrepresent the building. I once underestimated a porch depth by several centimeters. That small error changed the entrance’s visual balance.
Choose views that explain the exterior from practical human positions. An entry view should show the door, path, steps, and nearby lighting. A corner view can reveal wall depth, roof edges, and the relationship between floors. Add a rear or garden view when outdoor circulation matters. Mark camera height, lens range, and orientation in the brief. These details prevent accidental distortion. Too many views waste time.
Specify the required LOD before production begins. LOD defines how much physical detail the model must contain. For early approval, accurate massing, openings, roof forms, and materials may be enough. For construction-focused images, include window frames, drainage details, joints, railings, and realistic ground transitions. Link each view to its required LOD, lighting condition, and material notes. Yet the brief should remain flexible. Design decisions often change after the first rendering. Review the images against site photos and drawings. Perfect briefs do not exist.
Accurate exterior renderings begin with the ground, not the screen. Capture site dimensions before modeling walls, roofs, paths, and planting. Record façade width, floor-to-ceiling height, window positions, eaves, steps, and finished ground levels. A laser distance meter can provide quick readings, but reflective surfaces and uneven paving may create errors. Take three readings when a dimension controls the whole elevation. Aim for a maximum difference of ±2 cm.
Walk the site slowly. Photograph each corner with a visible scale reference. Mark measurement points on a simple sketch, then compare them with architectural drawings. Check diagonal distances, because a rectangular plan may be slightly skewed. I have seen a two-centimeter error shift an entire window rhythm in the final rendering. It looked acceptable on screen, but failed against the survey notes. That mistake needed correction.
The Royal Institution of Chartered Surveyors emphasizes consistent methods, documented assumptions, and traceable survey information in measured survey guidance. These practices support reliable visualization and reduce avoidable coordination problems. The U.S. National Institute of Standards and Technology estimated that inadequate data interoperability cost the capital facilities industry $15.8 billion annually in its 2004 cost analysis report. While the figure is dated, the lesson remains relevant: disconnected information creates expensive rework. Keep raw readings, site photographs, and revisions together. Do not hide uncertainty. If dense vegetation blocks a wall, label the dimension as provisional and schedule a second check.
Absolute difference between the initial site capture and the verification measurement for key exterior dimensions. Each value is compared with the required accuracy limit of ±2 cm.
Result: All recorded differences remain within the ±2 cm verification threshold, supporting accurate exterior modeling and rendering.
Accurate exterior renderings begin with reliable BIM data, not decorative modeling. Use verified dimensions, wall assemblies, roof pitches, window locations, and site levels. Check the model against architectural drawings before adding visual detail. A small height error can distort the entire facade. I usually inspect corners, eaves, and openings closely because these areas expose weak coordination quickly.
Keep the project coordinates consistent. Sun direction and camera height should match the design context.
PBR materials should follow measurable standards. Set correct albedo values, realistic roughness, and physically suitable normal strength. Use consistent texture scale, especially for brick, timber, concrete, and roof tiles. A brick pattern that is too large makes the house feel miniature.
Avoid excessive reflections on rough surfaces. They often look impressive but reduce credibility. I still revise materials after client reviews; initial assumptions are not always accurate. That is part of the process.
Tips: Compare the rendering with material samples, elevation drawings, and site photographs. Use neutral daylight before testing dramatic skies. Check the facade at eye level and from the street. Keep texture names and BIM object data organized for later revisions. Do not hide coordination problems with lighting. A clear model reveals them.
How to Create Exterior Home Renderings?
Accurate sunlight begins with true north, not the camera’s default orientation. Set geographic latitude and longitude before placing the house. Then choose the date and local time for the intended scene. Solar altitude controls shadow length. Solar azimuth controls its direction. A north-aware setup reveals whether morning light reaches the façade or misses it entirely.
Use a CIE sky model to describe the atmosphere. CIE 011:2008 defines standard sky luminance distributions for daylight studies. Clear skies create sharp shadows and stronger contrast. Overcast skies produce softer, wider illumination. For credible visuals, test both conditions. The UNEP Global Status Report for Buildings and Construction reported that buildings consumed 34% of global energy in 2022. Daylight accuracy therefore supports design decisions, not only attractive images.
Tips: Check true north against a survey or reliable geographic data. Compare the render with a solar-angle calculator. Use physically based exposure, realistic reflectance, and a calibrated display. I often render three times: morning, solar noon, and late afternoon. Small errors become obvious. A balcony may appear bright, while its interior remains unexpectedly dark. That result deserves investigation, not automatic correction. Weather files can also challenge the image, because a clear-sky model may exaggerate typical conditions. Use measured climate data when evaluating daylight performance.
| Workflow Stage | Data Dimension | Reference Value or Formula | Technical Basis | Rendering Application |
|---|---|---|---|---|
| 1. Establish Orientation | North reference | True north = 0°; east = 90°; south = 180°; west = 270° | Azimuth is measured clockwise from true north | Rotate the building or sun system so façade exposure matches the site survey |
| 2. Define Location | Latitude and longitude | Latitude controls seasonal solar height; longitude supports local solar-time conversion | Solar position depends on geographic coordinates and date | Enter the project coordinates before selecting sun direction or shadow studies |
| 3. Select Date | Solar declination | Approximately +23.44° at the June solstice, 0° near the equinoxes, and −23.44° at the December solstice | Earth’s axial tilt produces the annual change in solar declination | Use the actual visualization date when evaluating overhangs, glazing, and façade shadows |
| 4. Set Solar Time | Hour angle | H = 15° × (solar time − 12); 15° equals one hour of apparent solar time | The sun moves approximately 15° in azimuthal hour angle per hour | Convert clock time to solar time before positioning the sun |
| 5. Calculate Solar Height | Solar altitude angle | sin(α) = sin(φ)sin(δ) + cos(φ)cos(δ)cos(H) | α is the angle between the sun and the horizontal plane | Use altitude to control shadow length and the amount of direct light on vertical surfaces |
| 6. Calculate Solar Direction | Solar azimuth angle | At local solar noon, the sun is due south in the Northern Hemisphere and due north in the Southern Hemisphere | Solar noon is determined by the sun’s highest daily altitude, not necessarily 12:00 on the clock | Aim the direct-light vector toward the correct true-north azimuth |
| 7. Validate a Sample Position | Latitude 40° N at equinox, local solar noon | Solar altitude ≈ 50°; solar azimuth ≈ 180° | At the equinox, declination is approximately 0°, so altitude ≈ 90° − latitude | Use this as a basic scene check for a north-aware sun setup |
| 8. Compare Seasonal Angles | Latitude 40° N at solar noon | June solstice ≈ 73.44° altitude; December solstice ≈ 26.56° altitude | Values use declinations of approximately +23.44° and −23.44° | Test roof projections and façade shading under both high-sun and low-sun conditions |
| 9. Choose Sky Distribution | CIE standard sky type | Use a clear-sky distribution for strong directional sunlight or an overcast distribution for diffuse illumination | CIE standard skies describe how luminance is distributed across the sky vault | Match the sky type to the intended weather condition and visual purpose |
| 10. Define Sky Luminance | Zenith-to-horizon brightness gradient | Clear skies are generally brighter near the sun and horizon; overcast skies are brightest near the zenith | CIE sky models use angular luminance distributions rather than a uniform background | Avoid a flat environment light when realistic façade gradients are required |
| 11. Set Ground Reflectance | Diffuse ground albedo | Typical modeling assumptions: dark asphalt ≈ 0.05–0.15; vegetation ≈ 0.15–0.25; light concrete ≈ 0.40–0.60 | Albedo is the fraction of incident radiation reflected by a surface | Use ground reflectance to control bounce light under eaves and around lower façades |
| 12. Configure Direct Sunlight | Sun disc and shadow softness | The sun’s apparent angular diameter is approximately 0.53° | A finite solar disc produces physically plausible penumbra rather than an infinitely sharp light source | Use a physically sized sun disc and adjust only for artistic presentation when necessary |
| 13. Set Atmospheric Clarity | Aerosol or turbidity condition | Lower turbidity gives clearer, higher-contrast sunlight; higher turbidity increases haze and warm scattering | Atmospheric particles reduce contrast and redistribute direct solar energy | Coordinate haze, sun intensity, and sky brightness so they describe the same weather condition |
| 14. Check Façade Exposure | Incidence angle | Direct irradiance on a plane varies approximately with cos(θ), where θ is the angle between the sun direction and the surface normal | Lambert’s cosine law describes projected direct illumination on diffuse surfaces | Confirm that south-, east-, west-, and north-facing façades receive the expected relative light |
| 15. Final Quality Control | Scene verification checklist | Confirm true north, coordinates, date, solar time, altitude, azimuth, sky type, ground albedo, and shadow direction | A rendering is geographically consistent only when orientation, solar geometry, and sky distribution agree | Render a shadow pass and a clay pass before final materials and color grading |
Creating convincing exterior home renderings starts with controlled output, not a dramatic sky. I render at 2,000 pixels or higher on the longest edge, using sRGB IEC 61966-2-1. This profile keeps red brick, pale stone, and blue-hour shadows more predictable across common displays. The IEC color standard helps, but it cannot repair poor lighting decisions.
I inspect the image at 100% and at final delivery size. WCAG 2.2 specifies a 4.5:1 contrast ratio for normal text, which helps when checking labels or annotations over bright façades.
The 2024 Web Almanac reports that images contribute about half of typical mobile page weight. Large files can slow portfolio reviews. I export a high-resolution master, then create a compressed copy after checking edge detail, banding, and texture clarity. Keep both.
My QC pass is deliberately physical.
I compare the render with the material board, zoom into roof junctions, and scan every window reflection. I check straight verticals, repeated plants, contact shadows, and the horizon line. One missed seam can weaken a credible elevation.
I sometimes over-polish foliage. It looks attractive, yet less believable. A second reviewer should question scale, color neutrality, and whether the brightest surface steals attention from the entrance.
Record pixel dimensions, color profile, file format, and revision date. Small notes prevent expensive rework.
We use cookies on our website to give you an improved browser experience. View our Privacy Policy for more information. Please make your selection to opt in or out of ALL cookies here: Accept or Decline
Do you consent to the use of ALL cookies?
901 2nd Court West
Birmingham, AL 35204
Sales: 866.481.4036
Logistics/Ops: 866.481.4036
2101 Dralle Road
University Park, IL 60466
Sales: 708.813.9070
Logistics/Ops: 708.235.4200
400 E. 13th Street
Little Rock, AR 72114
Sales: 866.760.5344
Logistics/Ops: 866.760.5344
225 Collins Road
Elkhart, IN 46515
Sales: 574.295.0214
Logistics/Ops: 574.607.4611
601 Berryman Pike
Tipton, IN 46072
Sales: 800.897.7591
Logistics/Ops: 800.897.7591
3900 Uvalda Street
Denver, CO 80239
Sales: 303.706.8000
Ops/Logistics: 303.576.8398
510 3rd Street E
Milan, IL 61264
Sales: 800.322.1052
Logistics/Ops: 800.322.1052
1660 E. Aurora
Des Moines, IA 50313
Sales: 800.671.1660
Logistics: 800.671.1660
86554 Gene Lasserre Blvd.
Yulee, FL 32097
Sales: 904.253.3060
Logistics/Ops: 904.225.3000
694 S.E. County Road 245
Lake City, FL 32025
Sales: 800.727.6706
Logistics/Ops: 386.752.7412
210 Neptune Road
Auburndale, FL 33823
Sales: 863.967.1131
Logistics/Ops: 863.777.9814
4601 McCoy Drive
Pensacola, FL 32503
Sales: 850.308.7030
Logistics/Ops: 850.434.5502
815 South 56th Street
Tampa, FL 33619
Sales: 813.302.1940
Logistics/Ops: 813.621.1352
200 Hosea Road
Lawrenceville, GA 30046
Sales: 770.953.7575
Logistics/Ops: 770.513.6000
Branch Product Guide
Branch Line Card
Moulding Offering
Cedar Offering
Column Offering
8173 Hwy. 165 North
Monroe, LA 71211
Sales: 800.256.4165
Logistics/Ops: 800.256.4165
508 Warren Avenue
Portland, ME 04103
Sales: 207.888.2331
Logistics/Ops: 207.797.6565
4300 Georgia Pacific Blvd.
Frederick, MD 21704
Sales: 301.798.7474
Logistics/Ops: 301.874.8000
419 Maple Street
Bellingham, MA 02019
Sales: 508.449.0535
Logistics/Ops: 508.966.5500
825 Buchanan Ave SW
Grand Rapids, MI 49507
Sales: 877.800.1180
Logistics/Ops: 616.278.0909
995 Pacific St. NW
Aitkin, MN 56431
Sales: 800.432.3727
Logistics/Ops: 218.212.7770
1102 Port Terminal Drive
Duluth, MN 55802
Sales: 800.951.9899
Logistics/Ops: 800.851.9899
9110 83rd Ave. North
Brooklyn Park, MN 55445
Sales: 763.425.0204
Logistics/Ops: 763.425.0204
910 E. Railroad Street
Long Beach, MS 39560
Sales: 866.535.4135
Logistics/Ops: 228.205.2400
1727 Warren Street
North Kansas City, MO 64116
Sales: 800.621.2611
Logistics/Ops: 800.621.2611
2123 North Golden
Springfield, MO 65803
Sales: 800.375.7891
Logistics/Ops: 800.375.7891
13860 Corp. Woods Trail
Bridgeton, MO 63044
Sales: 314.209.0800
Logistics/Ops: 314.209.0800
1109 South 19th Street
Omaha, NE 68108
Sales: 800.489.6637
Logistics/Ops: 800.489.6637
1 Luger Road
Denville, NJ 07834
Sales: 973-339-3539
Logistics/Ops: 973.625.1461
3720 Jeffrey Blvd.
Blasdell, NY 14219
Sales: 716.235.5989
Logistics/Ops: 716.825.6557
319 Yaphank Ave.
Yaphank, NY 11980
Sales: 631.358.5714
Logistics/Ops: 631.924.7401
3300 Parkside Drive
Charlotte, NC 28208
Sales: 800.839.2588
Logistics/Ops: 704.394.3172
1712 East D Street
Butner, NC 27509
Sales: 984.389.8200
Logistics/Ops: 919.575.3700
128 Foothills Drive
Statesville, NC 28687
Sales: 800.222.1414
Logistics/Ops: 704.394.3172
550 Munroe Falls Rd.
Tallmadge, OH 44278
Sales: 330.357.4506
Logistics/Ops: 330.794.1141
10347 Toebben Dr.
Independence, KY 41051
Sales: 859.298.3926
Logistics/Ops: 859.746.2250
450 N. MacArthur
Oklahoma City, OK 73127
Sales: 800.375.6025
Logistics/Ops: 800.375.6025
1680 North Aspen
Broken Arrow, OK 74012
Sales: 918.272.2212
Logistics/Ops: 918.272.2212
522 Bridge Street
Hunker, PA 15639
Sales: 878.217.2001
Logistics/Ops: 724.925.7285
4290 Atlanta Street
Charleston, SC 29418
Sales: 843.371.1420
Logistics/Ops: 843.554.8192
1040 S. Industrial Dr.
Erwin, TN 37650
Sales: 423.641.1005
Logistics/Ops: 423.742.5911
4287 Pilot Drive
Memphis, TN 38118
Sales: 901.365.2101
Logistics/Ops: 901.365.2101
700 Myatt Drive
Madison, TN 37115
Sales: 615.327.9547
Logistics/Ops: 629.777.4949
4747 Mark IV Parkway
Fort Worth, TX 76106
Sales: 866.323.5117
Logistics/Ops: 817.625.9091
6990 Market Avenue
El Paso, TX 79915
Sales: 915.778.6356
Logistics/Ops: 915.265.7200
2502 Wilson Road
Harlingen, TX 78552
Sales: 800.580.6711
Logistics/Ops: 800.580.6711
10,000 North Loop East
Houston, TX 77029
Sales: 713.921.1977
Logistics/Ops: 713.675.3544
702 East 44th St.
Lubbock, TX 79404
Sales: 866.454.6010
Logistics/Ops: 866.454.6010
535 N. WW White Road
San Antonio, TX 78219
Sales: 800.284.0488
Logistics/Ops: 210.333.8112
142 Pine Haven Shores Rd.
Shelburne, VT 05482
Sales: 802.800.2540
Logistics/Ops: 802.985.2512
4700 Bethlehem Road,
Richmond, VA 23230
Sales: 804.201.2400
Logistics/Ops: 804.342.1161
4516 N Barker Road
Spokane Valley, WA 99027
Phone: 509.892.9420
Toll free: 800.728.6157
8365 N. 76th Street
Milwaukee, WI 53223
Sales: 800.356.9245
Logistics/Ops: 800.356.9245
312 S. Chester Street
Sparta, WI 54656
Sales: 800.362.5864
Logistics/Ops: 800.362.5864
899 Grossman Drive
Schofield, WI 54476
Sales: 800.472.0017
Logistics/Ops: 800.472.0017
